to Temper Chocolate)


For many cooks, there is nothing more daunting in the culinary universe than making candy, especially the chocolate variety. Why? It all comes down to one word: Tempering.
Traditionally a complicated and fairly labor-intensive process, tempering is a necessary step for two reasons. One, you get a snappy, professional-looking finish that looks way nicer than the dull matte finish you’d get from just haphazardly melting chocolate. Two, a tempered chocolate coating doesn’t melt on your hands or at average room temperatures, so you can store the candies on the counter without risking a huge mess. Also, it’s cool science!
The Science
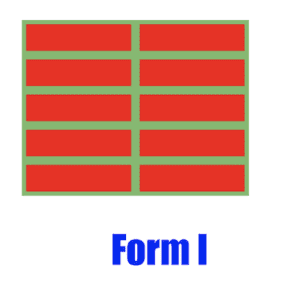
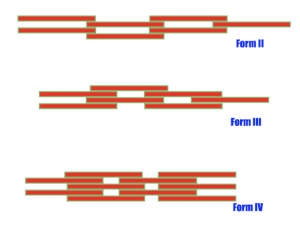
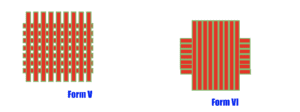
Just like candy-making itself, chocolate tempering is all about controlling crystals. The fat molecules inside chocolate (aka, cocoa butter) can stack into said crystals in not one, not two, but six different configurations (see the illustration below). When creating a chocolate bar or a chocolate coating for candy, we want a stable, shiny snap that doesn’t melt quickly in the hands, and that means maximizing form five while limiting one through four, which make chocolate either crumbly or gooey with a dull matte or grey finish (this is also called “bloom”). If we have too many form six crystals, your chocolate will be overly viscous (aka thick and gloopy)…not ideal for dipping. When we have a bunch of fives, the chocolate is referred to as being “in temper” — smooth, shiny, and delicious.
The Skill
The traditional method of tempering requires that we melt the chocolate to a temperature at which all the crystals have melted. We then lower the temperature and agitate to grow new crystals, both good and bad. Then, we raise the temperature slightly to melt out just the bad ones. Sound easy? It is…if you have a professional tempering machine or you are ready and willing to put in a lot of time to practice (and clean up the inevitable mess…and you know how I feel about messes…).
However, with the help of a good digital thermometer, careful use of a double boiler, and a whole heck of a lot of stirring, we can coax both milk and dark chocolate into a fluid state without forcing it to lose its temper by simply, but carefully, bringing it to its ideal tempering temp — for milk that means 88°F and for dark that means 91°F. Instead of worrying about heating and cooling and heating again, we only have to worry about one target temperature.
Why those different and highly specific temperatures? Milk chocolate contains milk powder; ergo, butterfat. Those fat molecules tangle up with those of cocoa butter to form an alloy that actually has a lower melting point than either of the crystals would have on their own. Because this melting temperature is so low, it’s easy to overshoot our target temp. Dark chocolates don’t contain this extra milk fat, so the temperature at which we achieve temper is just a touch warmer, 91°F to be exact.
Another key to snappy tempering is to make sure to stir the chocolate aggressively. This stirring process (aka agitation) both encourages the growth of chocolate crystals and ensures that the chocolate pieces are melting at an even rate. Consider it your upper body workout for the day.
The Shopping
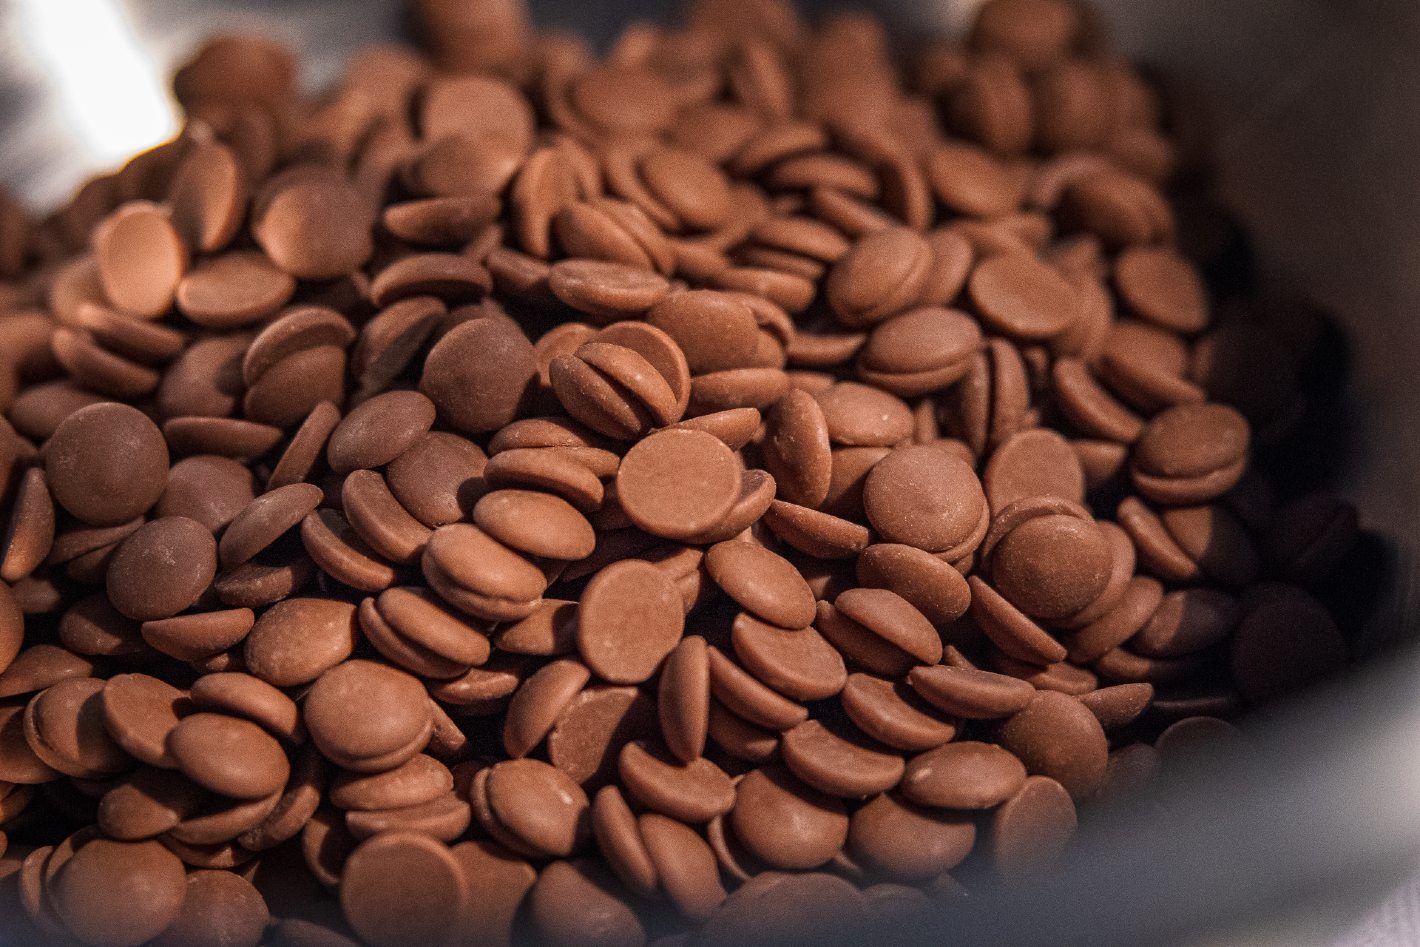
When it comes to melting, skip the chocolate chips. They’re formulated to retain their shape when heated, making them ideal for cookies, not so much for candy. For the easiest tempering experience, I’d suggest going with couverture chocolate discs. Couverture discs look like large baking chips, but they have a higher fat content so they’re perfect for melting. I particularly like Callebaut’s “callets,” but brands such as Valrhona and Guittard also make great couverture chocolate. Well worth keeping on hand if you plan on chocolate-coating things and you can find it easily on the interwebs.
You can, however, also make the process work with high-quality grocery store chocolate bars, such as those from Ghirardelli. Just make sure you’re not purchasing chocolate bars with added flavors and that you’re finely chopping them before use.
As for the procedure, here’s how I do it:
- Place a folded kitchen towel in the bottom of an 11-inch straight-sided sauté pan or large skillet. Add 1 inch of water, place over medium-high heat, and bring to a bare simmer, about 190°F. (Yes, there’s a towel in the pan…it’s okay.) Place another folded kitchen towel right next to the stovetop.
- Place the chocolate in a metal bowl that will fit in the sauté pan and set in the hot water. Stir constantly for 5 seconds. Remove from the heat, set on the towel, and stir vigorously for 30 seconds. Return to the hot water and stir for another 5 seconds, then back to the dry towel for 30 seconds. Repeat until the chocolate is half-melted, then reduce the time the bowl is on the heat from 5 to 3 seconds. Keep the off-heat stir time at 30 seconds. The goal is to melt all of the chocolate while keeping the temperature below 91°F for dark chocolate, or 88°F for milk chocolate. This process can take anywhere from 10 to 20 minutes, depending on the size of the chocolate pieces. If the chocolate begins to creep up above the target temp, leave the bowl on the counter and stir like crazy until the temperature drops back down. Continue with the melting process.
- Once the chocolate is a smooth liquid, stir vigorously for another minute before dipping, coating, or pouring. If at any point the chocolate becomes too thick or hard to work with, return it to the hot water for a few seconds, stirring constantly. Again, do not let the temperature rise above your target temperature.
Ready to try it? Here are a few applications to get you started:
Deep Dark Disks of Minty Magic
A crisp and shiny bittersweet chocolate coating balances the sweet, minty filling in these homemade candies quite nicely.
Smooth milk chocolate provides a professional finish to these crispy, peanut-free treats.
Sweet, crunchy, and surprisingly simple chocolate bark makes an impressive snack or accompaniment to classic s’mores.
A tropical treat made even sweeter with a shiny coating of semisweet chocolate.


Sign Up for the Newsletter